Introduction to Smartphone Photography
Smartphone photography has transformed how we capture and share moments. With a smartphone always at hand, anyone can snap stunning photos that rival those from more expensive cameras. Whether you’re a budding photographer or a casual smartphone user, learning a few Smartphone photography Tips & tricks can greatly improve the quality of your pictures. From mastering the basics of lighting and composition to exploring editing apps, this guide offers essential tips to elevate your smartphone photography game.
Table of Contents
Getting to Know Your Smartphone Camera Features
Understanding your smartphone’s camera features is the first step in taking better photos. Newer smartphones come equipped with advanced features like night mode, portrait mode, and manual settings, which can dramatically improve your shots.
- Portrait Mode: Helps in achieving a shallow depth of field, making your subject stand out.
- Night Mode: Enhances photos taken in low light, capturing more detail without flash.
- Manual Settings: Adjusting ISO, shutter speed, and white balance gives you greater control over the shot.
Experimenting with these modes and settings will help you understand how they affect your photos and when to use each one for the best effect.
Mastering Composition Techniques
Composition is the art of arranging elements in your photo. Strong composition can make even a simple subject look compelling.
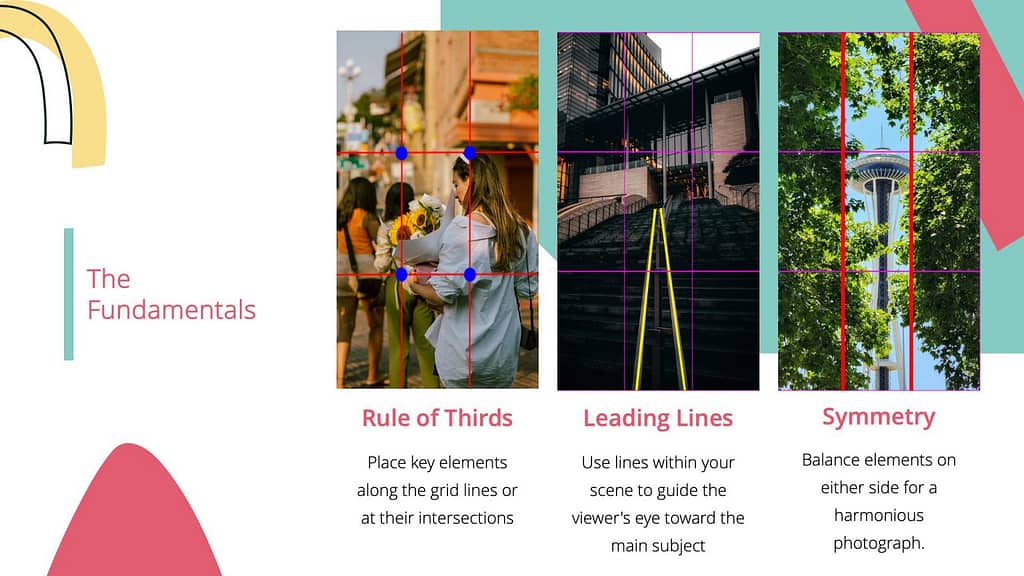
- Rule of Thirds
- Dividing your frame into nine equal sections and placing your subject along the lines or intersections can make your image more balanced and engaging. Most smartphones come with a grid option to help with this.
- Leading Lines
- Lines that lead the viewer’s eye into the photo add depth. Roads, pathways, and natural features like rivers or tree lines work great as leading lines.
- Framing
- Use elements within the environment, like windows or trees, to frame your subject, drawing attention directly to it.
- Symmetry and Patterns
- Look for natural or architectural symmetry and patterns—they’re visually appealing and can create a satisfying sense of balance.
- Negative Space
- Allowing empty space around your subject helps it stand out and adds a sense of minimalism.
Best Lighting Practices for Smartphone Photography
Lighting can make or break a photo. Learning to work with natural light and understanding how to use artificial light will enhance the quality of your images.
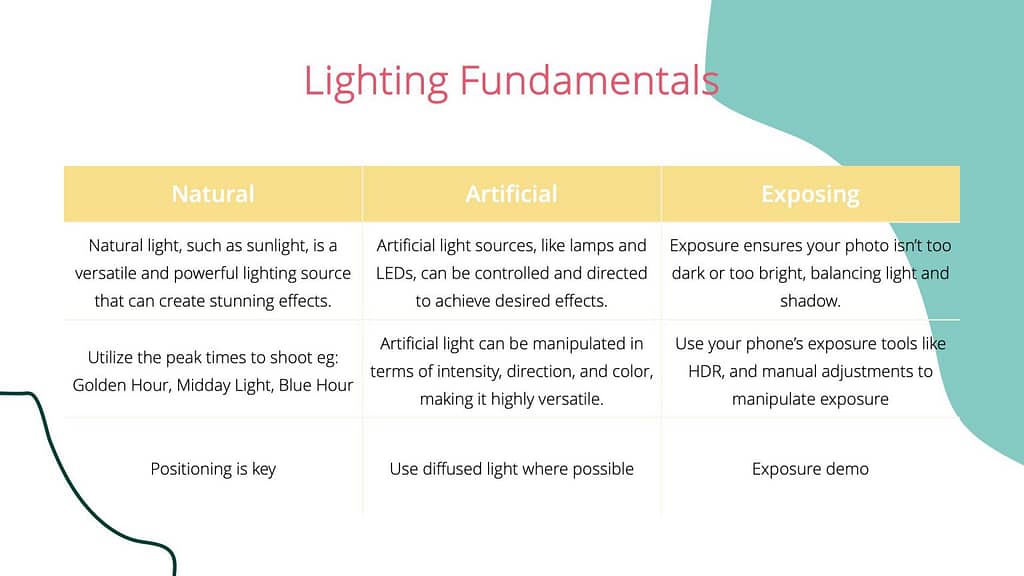
- Use Natural Light
- Whenever possible, rely on natural light, especially during the “golden hours” (early morning or late afternoon), when light is soft and warm.
- Avoid Harsh Midday Sun
- Bright sunlight creates harsh shadows. Look for shade or shoot with the light source behind you.
- Experiment with Backlighting
- Backlighting, when the light source is behind the subject, can create a glowing effect or silhouette, adding drama to your shots.
- Use Reflections and Shadows Creatively
- Use reflections from windows, water, or mirrors to add interest to your photos. Shadows can also add mood and depth.
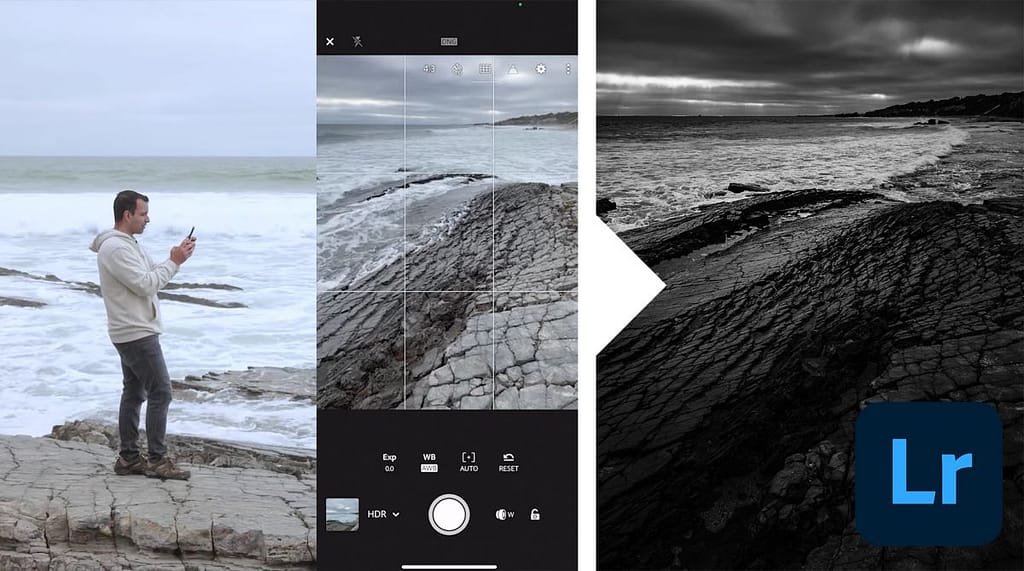
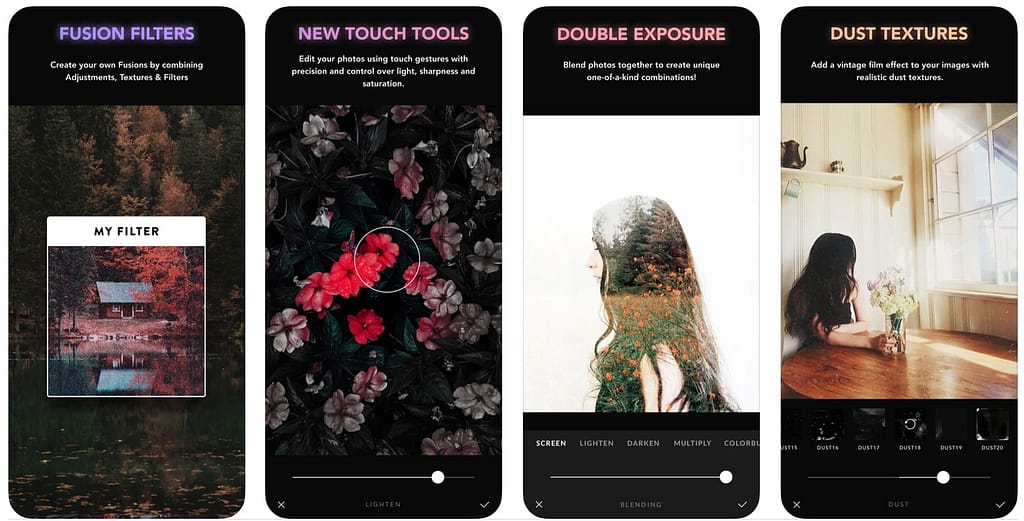
Editing Essentials for Smartphone Photos
Editing is an essential part of photography, allowing you to enhance and refine your images. Many editing apps offer powerful tools for adjusting brightness, contrast, color, and sharpness.
- Cropping and Straightening
- Start by cropping to remove unwanted elements and straighten your photo for a balanced composition.
- Adjusting Brightness and Contrast
- Adjust the brightness to make your photo look well-lit and adjust contrast for depth and definition.
- Enhancing Colors
- Increase saturation or vibrance to make colors pop, but be careful not to overdo it.
- Sharpening Details
- Adding a bit of sharpness can make your photo crisper. However, too much can make it look unnatural.
- Using Filters Wisely
- Filters can give your photos a consistent look, but apply them sparingly for a more natural result.
Here are some popular photo editing apps for smartphone photography
1. Snapseed
Pros:
- User-friendly interface with powerful editing tools.
- Offers selective adjustments to edit specific areas of the photo.
- High-quality filters and a wide range of editing tools.
- Free to use and available on both iOS and Android.

Cons:
- Lacks cloud storage for saving progress.
- Limited text editing and layering options.
Benefits: Snapseed is an excellent choice for beginners and advanced users alike. Its selective adjustment tool allows you to fine-tune specific areas, which is particularly useful for enhancing details or fixing minor issues without affecting the entire image.
2. Adobe Lightroom Mobile
Pros:
- Advanced photo editing tools and adjustments.
- Supports RAW photo editing, which offers more control and quality.
- Syncs with Adobe Creative Cloud, allowing easy access across devices.
Cons:
- Some advanced features require a subscription.
- Steeper learning curve for beginners.
Benefits: Lightroom Mobile is perfect for those who want professional-level editing on their smartphone. Its RAW editing capability and detailed adjustments give you precise control over exposure, color balance, and more, making it ideal for photographers who want to retain image quality.
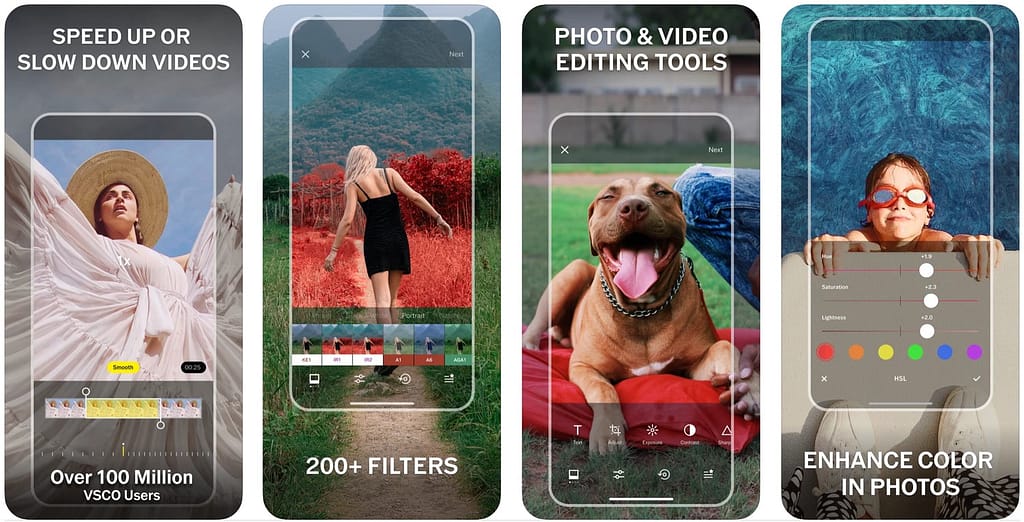
3. VSCO
Pros:
- Offers a unique, film-inspired filter library.
- Easy-to-use interface with quick editing options.
- Community feature lets you share and get inspiration from other creators.
Cons:
- Some filters and advanced tools are only available with a paid subscription.
- Limited manual adjustment options compared to Lightroom.
Benefits: VSCO is known for its distinctive filters, which can give your photos a consistent, polished look with minimal effort. The app’s social aspect also lets you explore trends, see other photographers’ work, and gather inspiration.
4. Afterlight
Pros:
- Wide range of filters and textures for creative effects.
- Includes basic editing tools and customizable filters.
- Simple interface with easy-to-use tools.
Cons:
- Some advanced tools are locked behind a paid subscription.
- Limited features compared to more comprehensive apps like Lightroom.
Benefits: Afterlight is ideal for quick edits and creative enhancements. It provides access to fun textures, overlays, and frames, making it great for users who want to add an artistic touch to their images without too many technical adjustments.
5. PicsArt
Pros:
- Robust features like stickers, text, collage-making, and effects.
- Includes drawing tools for added customization.
- Large community for inspiration and sharing.

Cons:
- Free version contains ads and some limitations.
- Can be overwhelming due to a large number of features.
Benefits: PicsArt is a versatile app, offering much more than photo editing. Its collage and sticker features make it excellent for social media content creation, while its drawing tools allow for a more customized approach to editing. Perfect for users looking to add a creative touch to their photos.
6. Canva
Pros:
- Great for adding text and graphic elements to photos.
- Pre-designed templates for various social media platforms.
- Free to use, with additional premium features available.
Cons:
- Limited advanced photo editing features.
- Some features only available in the premium version.
Benefits: Canva is a popular choice for content creators who need to add text, shapes, or other graphics to photos. It’s widely used for creating social media posts, marketing material, and quick visual content due to its easy-to-use templates and vast library of graphics.
7. Prisma
Pros:
- Offers unique art-inspired filters that transform photos.
- Simple interface and easy-to-use effects.

Cons:
- Limited traditional photo editing tools.
- Most unique filters are locked behind a subscription.
Benefits: Prisma is ideal for artistic users who want to turn photos into pieces of art. Its filters are inspired by famous painting styles, which can give your images a unique, creative look. Perfect for experimenting with a bold, artistic style.
Leveraging Accessories to Enhance Photos
Accessories can help you get the most out of your smartphone camera. Here are some popular options:
- Lenses: Wide-angle or macro lenses allow you to capture more diverse scenes and details.
- Tripods: Stabilize your phone for clear shots, especially in low light or for long exposures.
- Lighting: Small LED lights or ring lights provide consistent lighting when natural light isn’t available.
- Remote Shutters: Avoid shaking the camera when you press the button, especially for low-light or macro photography.
Conclusion
Smartphone photography is more than just pointing and shooting. By understanding your phone’s camera features, mastering composition, utilizing lighting, and enhancing your images through editing, you can capture photos that leave a lasting impression. Practice these techniques and watch as your photography skills grow. Remember, great photos are a blend of skill, creativity, and the right tools—so keep experimenting and refining your unique style.
FAQs about Smartphone Photography
Q1: How can I take professional photos with a smartphone?
Using techniques like the rule of thirds, natural lighting, and post-processing with editing apps can help you achieve a professional look.
Q2: What is the best camera setting for low light?
Night mode is ideal for low light, as it captures more detail. Alternatively, increase the ISO setting but be cautious of noise.
Q3: Which is better: portrait mode or regular mode?
Portrait mode is ideal for single subjects, giving a more professional look with blurred backgrounds. Regular mode is better for landscapes and group shots.
Q4: Are smartphone lenses worth buying?
If you want more variety in your shots, such as wide-angle landscapes or macro details, investing in smartphone lenses can be worthwhile.
Q5: What apps are best for editing photos?
Some popular apps include Snapseed, Lightroom, and VSCO, which offer a wide range of tools for enhancing images.
You Might Also Like These Posts
- Top 10 Hidden Smartphone Features You Probably Didn’t Know About
- Essential The Best Hiking and Travel-Friendly Tech Gadgets Under ₹5,000
- The Ultimate Guide to Content Creation for YouTube and Blogging 2024: Pros, Cons, Platforms, and Pricing
- Should You Buy (2023) Last Year Smartphone? The Truth Unveiled! Full Explained